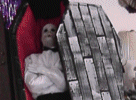
BIY Mummy Shorty
or
Build It Yourself Directions for Shorty
|
|
These directions for BIY Mummy Shorty are very easy.
Shorty can be used for anything:
-
You can put him in the crypt that you built earlier.
-
You can put him in front (or behind) of any of your tombstones.
-
He can sit in a chair at your desk as a in-house prop.
-
Just about anything that you can think of.
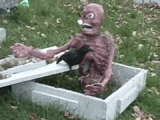
Oh, a fun thing to do is that you can sit him in your car while you are driving around and let others um...., wonder. You get great laughs (trust me - we did it with My Lady). Some people try NOT to look and some look and then die laughing. It's great! (Definitely a great Halloween prank that doesn't hurt anyone or anything!)
This BIY mummy Shorty, aHalloween prop, is a static prop.
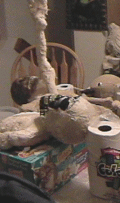
The basic mummifying is the same as the Halloween corpse with the supplies and preparations used. You can print the instructions off of that page.
There are a few things that are different though.
|
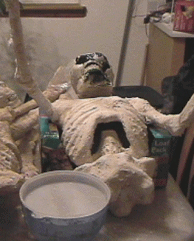
1. The chest cavity under the ribs was cut out to give it a real rib cage look. Just cut out a section and leave it open. |
2. The fingers on the hands were separated. The fingers were cut apart on either side of the blucky hand and then taped individually. |
|
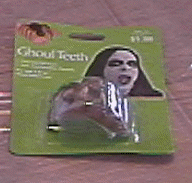
3. The teeth on the head were cut out and replaced with ghoul teeth. This is regular costume teeth.
After I cut the teeth out I used Liquid Nails (LC-130) Window & Door Acrylic Latex Caulk Plus Silicone to attach them. I put a ribbon of glue inside the rubber part of the teeth and then attached to the skull. I held it down until it dried. Be sure to paper mache on top of the rubber edges of the teeth. That will give the teeth more glue to stay on and look like lips - sort of. |
|
|
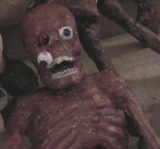
4. The black eye sockets on the skull were cut out to make room for eyeballs (ping pong eyeballs). |
One eye was attached from the inside of the skull. One eye was hot glued onto the face right above the teeth. Then I took the hot glue and touched the top of the eye socket and ran it down to the eyeball. I did this several times until I got it thick enough to look like "eye tendons". Then I painted the glue red. |
 |
5. No legs! Hence the name - Shorty! |
|
6. The paint was a bit redder than the other mummies. I also added chestnut wood stain as a top paint layer. |
|
7. The finishing top coat was American Accents Clear Top Coat, Protective Crystal Clear Finish (from Walmart in the paint department.) This gave him a bit of a shine but it offered extra protection from the outside elements. |
|
Should you need any help or have any questions about this BIY mummy Shorty or the crypt, please don't hesitate to contact me. I would gladly help in any way that I can. No question is a dumb question.
Have fun! |
|
