BIY Little Missy
or
Build It Yourself Directions for Missy
|
|
These directions for BIY Little Missy are just as easy as they are for Shorty.
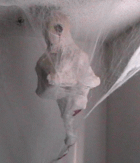 Missy
can be hung around just about anywhere. We had her in our spider room (family
room).
The family room usually gets set up as the spider room because we can reach the ceiling a lot easier than in the living room (vaulted ceilings).
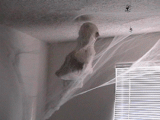
The vaulted ceiling would give the webs a different look but we liked easy (and quick). Besides, there was a corner we weren't using and it was great for Missy.
This year we will be putting Missy out on the front porch with cobwebs (of course). I just wanted to add a protective coating to her as she had been used inside before.
This BIY Little Missy, Halloween prop, is a static prop.
The basic mummifying is the same as the Halloween corpse with the supplies and preparations used. You can print the instructions off of that page.
There are a few things that are different though.
|
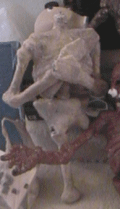
1. After her arms and hands were prepped with tape, her arms were crossed in front of her and taped to her chest. |
2. There was only upper portion of one leg used. (The rest had already been eaten or torn off. Ouch!) |
|
|
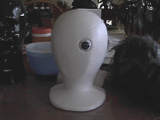
3. The head was swapped out for a styrofoam head. An eye hole was dug into the stryofoam and we put in a ping pong eyeball. |
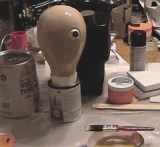
4. We painted the front of the head with flesh colored paint. To get that color, we mixed white latex paint (on the left) with small amount of black latex paint (the head is sitting on that one) and a small amount of orange craft paint (on the right). |
|
5. The base of the styrofoam head was removed so that it would make part of her neck. We dug out a hole in the bottom so that the head would fit on the knob on top of the torso. |
|
6. You can't see it in any of these pictures but our BIY Little Missy has long brown hair with bangs. We used Red Heart Symphony yarn (worsted medium) Earth Brown (from Walmart). It's real fluffy yarn - super soft, mostly for knitting scarves and hats. There were short strands of yarn in front for bangs and long strands for hair down the back (just past the bottom of the neck). The strands were glued (Elmer's glue) at the seamline on top of the styrofoam head and the hair hung loose. |
|
|
|
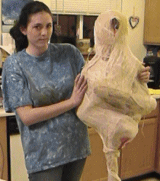
7. We then took some cheesecloth (also from Walmart) and dipped it into the paper mache. We weren't too worried about getting all of the cheesecloth wet but just the majority of it so that it would stick. Pull it out of the paper mache and squeeze out the excess. My daughter, Amber, helped and held our BIY Little Missy while I wrapped the cheesecloth around. We did a bandage effect around the head making sure that the eye and some bangs were showing. We didn't want to wrap too thick (wanted to see some of the details inside the web). Just enough. In the back there is a single layer and a gap between cheesecloth so that you can see her hair down her back. |
|
8. We dabbed on some red paint below the eye. Dabbed paint where the other leg should have been. Also painted the dangling cheesecloth at the bottom of the short leg. |
|
|
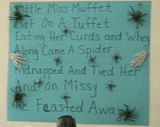
9. Amber came up with this really cool Little Miss Muffet poem that we put on poster board and hung on the wall near Missy. |
10. We had a hanging plant hook in the ceiling that we designated as Missy's "hold up" hook. We wrapped some household string around her neck area and hung from that hook. We then added cobwebs to her. You could not see the string! It was great - looked like she was suspended in the webs. |
|
Should you need any help or have any questions about this, please don't hesitate to contact me. I would gladly help in any way that I can. No question is a dumb question. Have fun! |
|
